DIY: Installing Pavers ON TOP OF Concrete
You might already have a functional concrete driveway or a concrete pathway in your landscaped garden that is neat and tidy but the colour is dreary, looks boring or doesn’t complement the rest of your home.
So how can you change it?
You can completely change the aesthetics of your concrete space by using pavers or tiles.
Tiling over concrete is actually a lot easier than you think! Here’s a basic step-by-step guide for all three options of installing pavers on top of your existing concrete.
Why it’s Easy to DIY
People assume that tiling or paving on top of concrete floors, driveways, patios and paths would be a huge headache if existing plain concrete is already there. But the reality is, you can actually complete the project a lot more quickly.
Requires Very Little Technical Skills
Achieving a remarkable tile finish to your concrete surface actually requires very little technical know-how. It’s so easy that it is actually a very common and popular DIY project amongst homeowners. You’ll only need to have basic knowledge in the process which we will provide for you here in this blog.
A Lot of ‘How to’ Resources can be Found Online
If you search online, you’ll find hundreds of ‘how to’ articles that range from the most basic guides to the most technical step-by-step run-throughs. In this blog, we will share with you an easy guide on the entire process plus additional tricks so your finished product looks professionally done.
Materials Are Easy To Source
Tiles and pavers are appealing because of the countless materials you can choose from, to give you your desired result. The products available are so varied that you can easily achieve the look to complement the design of your home.
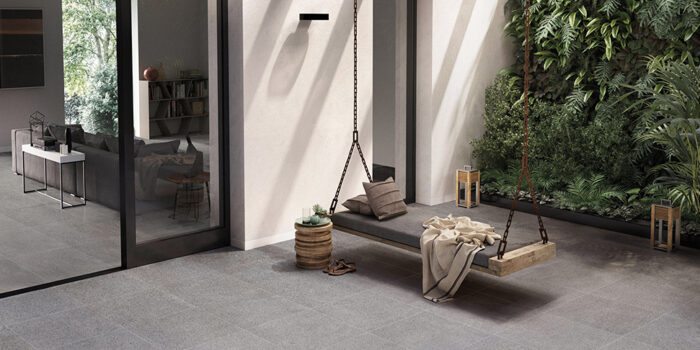
Australian Paving Centre offers a wide variety of pavers and tiles that can specifically be used on top of concrete. These are all durable, highly stylish and slip resistant materials with varied finishes that will fit any home design. Any of these products may be used for both indoor and outdoor applications to suit any of your home improvement projects. Give your home a luxurious feel or a modern look, or add a bit of your personality by re-designing your concrete space with any of these pavers or tiles.
Check out the products below suitable to pave over your concrete to see which ones will fit your home and which ones speak to your personal style. Visit any Australian Paving Centre store near you and we will be happy to give you our expert recommendations and you can take home a free sample.

Important Considerations Before Laying Your Pavers
Before laying pavers on your concrete surface, there are several considerations you need to make. Not the least of which are the materials you should use.
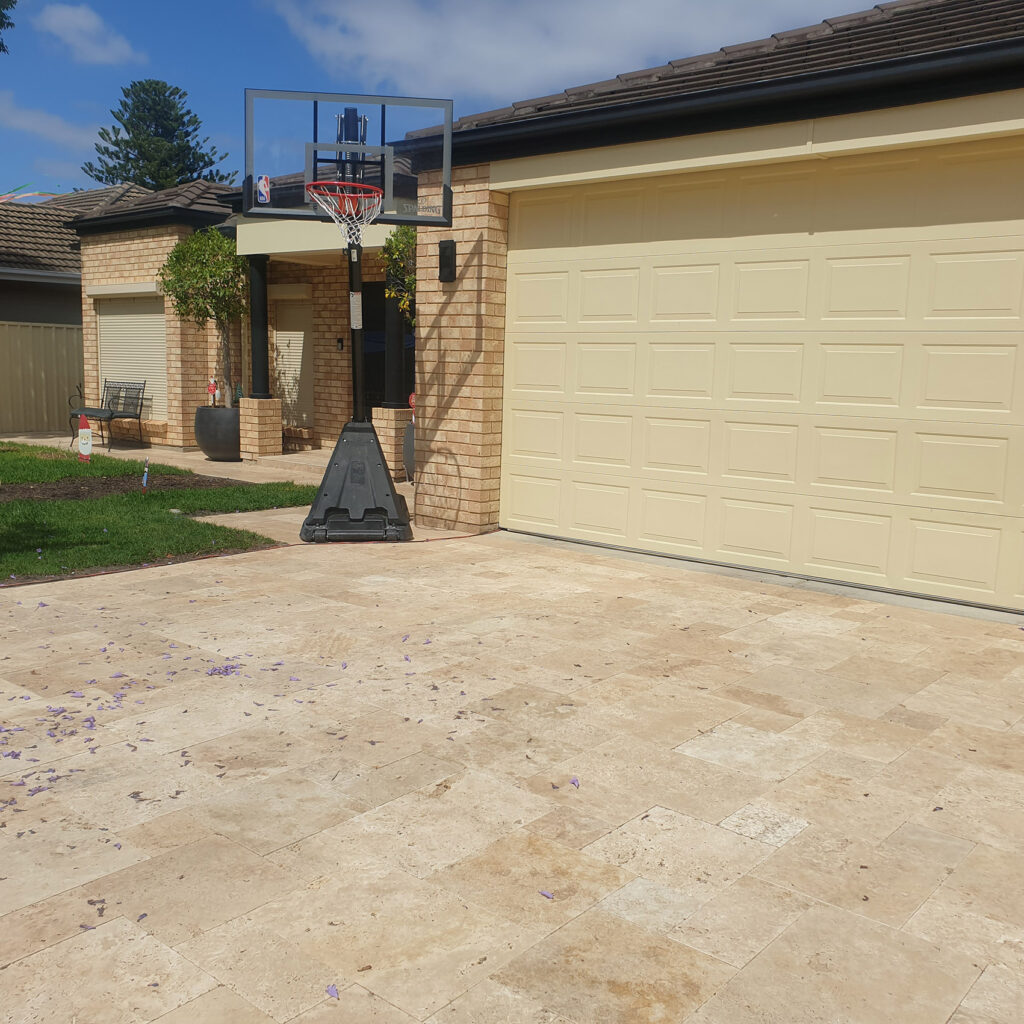
Keep in mind the function of the area and space that you’ll be updating and how much weight it is expected to withstand before deciding on one particular material and design. If it’s a concrete driveway you are paving over, you have to use pavers suitable for vehicle traffic like bricks for long-lasting endurance. If it’s for your pool surround, ensure you’re using pavers suitable for your pool area that are salt and slip resistant and you may want a matching coping or step treads. Consider also the environment you live in, is it a sunny location so something that is cool underfoot would be desirable, coastal areas or the general aesthetics of your landscape and area because selecting the right pavers will add value to your home.
The right type of paver for your surface is critical for its longevity. You want to achieve a properly installed flooring the first time around to avoid having to redo it all over again two or three years down the road.
Existing Concrete on the Job Site
Once the all-important phase of choosing materials and design is done, it will be time to assess your concrete slab. Pavers are normally laid over a sand and rubble base so laying them over existing concrete will require a different approach.
Remember, your aim is to extend your living environment so it’s vital that the flow from indoor to outdoor space becomes seamless. Whether your project involves a patio area or driveway, you have to make sure the height of your existing surface will allow a good distance between the door sill and the thickness of the newly installed pavers and not impede upon any damp course membranes.
Consider also the new height your newly paved surface will be from the ground once new pavers are installed. Will you be able to conceal the surrounding edges and borders so as to hide the increased height? This can mean additional costs but a little creativity is all you’ll need.
However, if your existing slab is in poor and unsalvageable condition with cracks and is not level, it may be better to demolish the slab and start from scratch. Especially if making all these changes will cost you more than just excavating the concrete and laying paver on the ground.
Proper Drainage of the Site
Make sure your concrete foundation is properly sloped and doesn’t accumulate surface water. Laying pavers over this material may pose problems to the drainage as concrete slabs have the inability to drain water through the blocks and into the earth. Follow the concrete’s slope when installing the pavers and make sure the edge that drains water stays low and permeable. A trick you can do is drilling small holes through the concrete every few inches to help eliminate puddling.
The importance of the choice of materials is extremely important. Choose permeable pavers if your surface needs adequate drainage. You have to select materials according to functionality and not just style.
Some Misconceptions
Contrary to popular belief, installing tiles over existing concrete actually makes a lot of sense. Concrete is heavy, solid and provides a strong base. Add to that, the fact that both tiles and concrete are both mineral-based so it makes sense that they would be a perfect match.
There will be no need to cut up old concrete and pay money to cart it away to the dump. You also don’t need to worry about damage to existing underground services. Easy to DIY, extremely durable and the additional advantage of so many new looks and designs made possible by the wide range of paver products available!
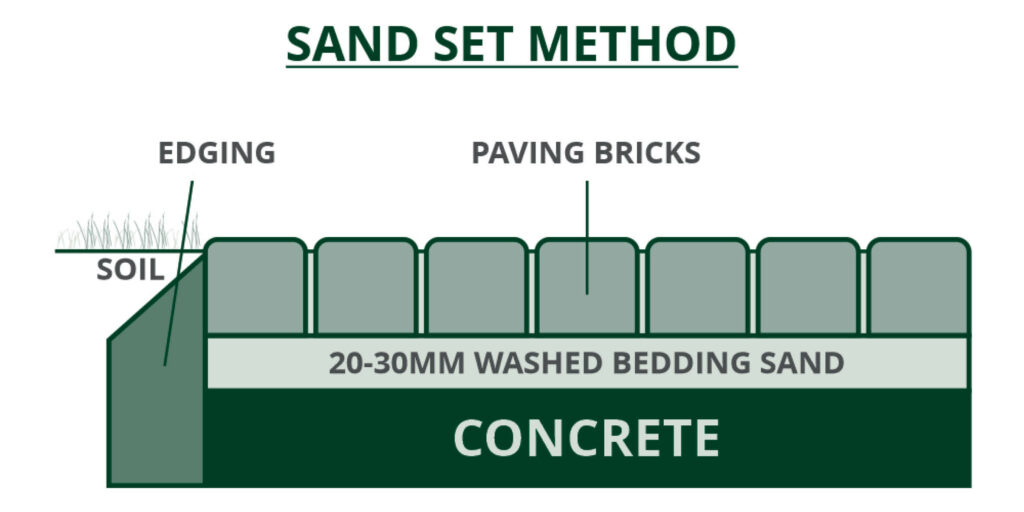
INSTALLATION OPTIONS
There are three basic methods for installing pavers over existing concrete. These are the sand set, glue set and mortar set (wet lay) methods.
Sand Set Method
This method is more popularly used for paved pathways or walkways with light traffic. This may also be used for vehicular applications but a suitable curb or edge restraint is required.
Steps in Using This Method
Step 1. Screed 20-30mm of quality washed bedding sand on the concrete surface. Tip – Refer to our DIY Paving Guide, Step 3 Screeding the Bedding Sand. The bedding sand will allow for drainage, settling and the expansion and contraction of the pavers.
Step 2. Complete your paver installation as per best common practice for the product being installed.
Step 3. Install the edge restraints securely so that the pavers don’t shift or move once it is in use.
Step 4. You will need to fill the gaps between the brick pavers with jointing sand once all the pavers are laid.
Step 5. Compact the laid pavers. Three passes should be sufficient to secure the bricks. And your new paved area should be ready for use.
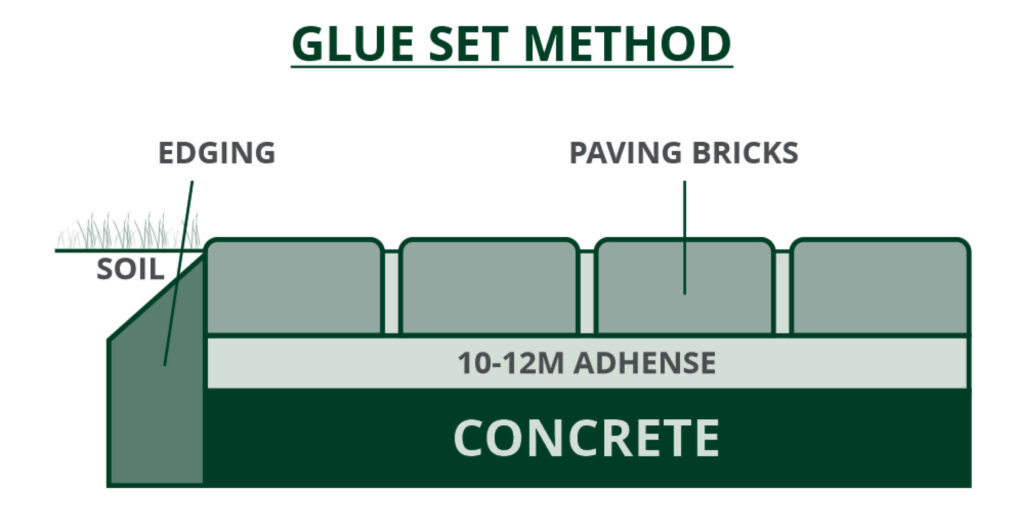
Glue Set Method (Wet Lay)
This method is commonly used in circumstances where more strength is required, ideal for driveways and pool surrounds. A bed of adhesive glue is used to make the pavers/tiles adhere securely to the concrete base. An easy DIY option especially if the levels and falls on the concrete base are all correct.
Steps in Using This Method
Step 1. Plan out your pattern/layout in advance. Knowing your start and finish points is important so that your tiles will look neat. Prepare the surface by cleaning and sealing with a bonding agent if required.
Step 2. Prepare your adhesive as per the manufacturers guide lines. Apply the adhesive to the concrete surface with a notched trowel. Tradies Tip: Ensure that you don’t mix too far in advance, or it’ll begin to set before you use it.
Step 3. Install your pavers/tiles as per best common practice for your product.
Step 4. You will need to fill the gaps between the pavers/tiles with jointing sand or a suitable grout once all the pavers/tiles are laid and adequate time has been allowed for the adhesive to set. Clean off and your new paved area should be ready for use.
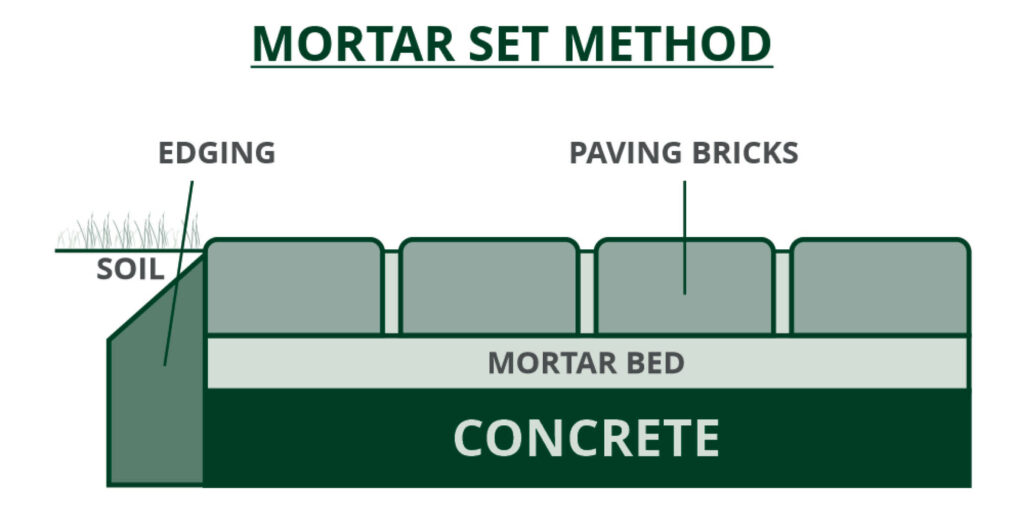
Mortar Set Method (Wet Lay)
As with the Glue Set Method this application will result in a more strong, durable finish. This method is more commonly used where a thicker bed is required due to the concrete base not being as sound, might be a little uneven or the falls are going the wrong way.
Steps in Using This Method
Step 1. Plan out your pattern/layout in advance. Knowing your start and finish points is important so that your tiles will look neat. Prepare the surface by cleaning and sealing with a bonding agent if required.
Step 2. Mix the mortar. Before mixing mortar, keep in mind that different mortars or tiling cement work best with different types of tiles. After selecting a compatible mortar or tiling cement, follow the instructions.
Step 3. Apply the mortar. Screed the mortar bed off to the desired levels. Ensure that you don’t mix too far in advance, or it’ll begin to set before you use it.
Step 4. Start the installation. Lay the pavers/tiles on the mortar bed as per best common practice for the product being used. Be careful with doing it right the first time, as you’ll find that a small adjustment to one usually means an adjustment to all others. Constantly check the top of your pavers/tiles with a straight edge and level to ensure all are laid correctly.
Step 5. You will need to fill the gaps between the pavers/tiles with jointing sand or a suitable grout once all the pavers/tiles are laid and adequate time has been allowed for the mortar to set. Clean off and your new paved area should be ready for use.
Doing it Yourself Is Not Hard
You can easily dress up your pool, patios, outdoor entertainment areas and even the driveway by laying pavers over existing concrete. Like any DIY project, laying pavers over an existing concrete surface can be done easily as long as it is accompanied by considerable planning, learning the needed knowledge and skills and a substantial amount of patience and determination.
If you’re in need of supplies or expert advice to help you re-create your outdoor space, there’s no better place to start than with friendly professionals at your local APC store!
Visit us today or call us at 08 8391 3467, we would be happy to answer your questions!
Visit us at APC to pick up a free sample!
Or, send us a product enquiry or request a quote online